
| Back to Library page |
Click on the images below for a full sized image
Hoffman Old Style Chassis
Page0 - Page1 - Page2 -
Page3 - Page4 |
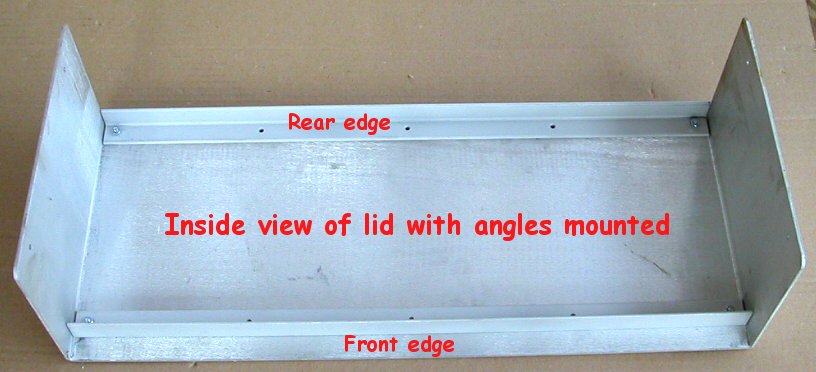 |
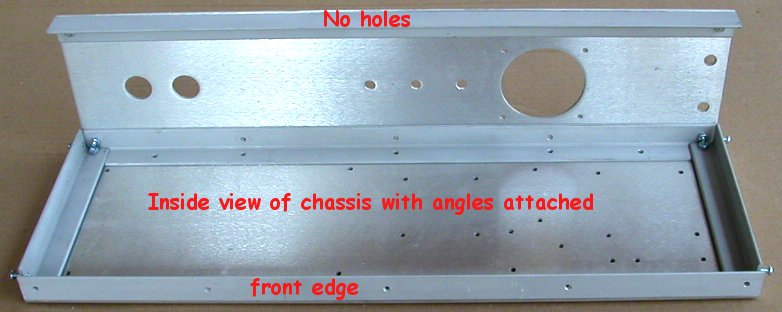
| Note that the front edge angled piece sits back about an inch from the front edge. |
| - |
 |
| Note that I have assembled the chassis and lid for demonstration purposes using only a few screws. You will use all the screw holes when assembling the chassis for real. |
| - |
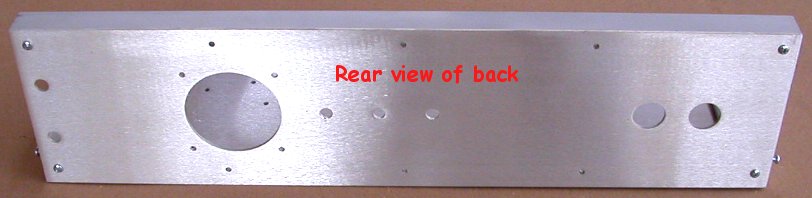 |
| Rear view |
| - |
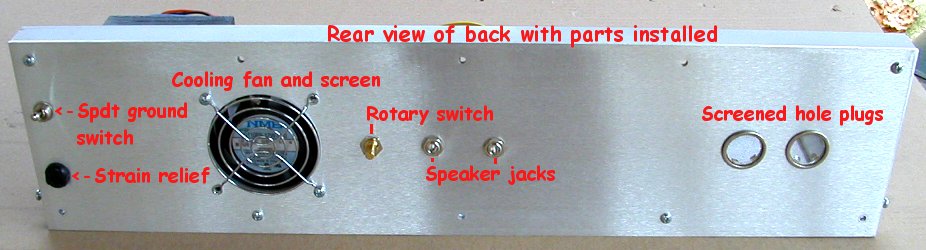 |
| Here you can see the rear view and what all the holes are for. Going from left to right. There is a Carling SPDT ground switch. Below that is a power cord strain relief. Then a chrome cooling fan grille. The cooling fan is sucking hot air out of the chassis. The cooling fan and grille are square. The holes are 2 13/16" center to center on the fan and grille. Next is a 3 way rotary impedance selector switch. Then 2-12A Switchcraft speaker jacks. All the way on the right end are two hole plugs that have screen in the center. The fan sucks air into these holes and blows the hot air out at the other end of the chassis. You do not need to have screens in these holes but you do need to have a cooling fan installed. |
| - |
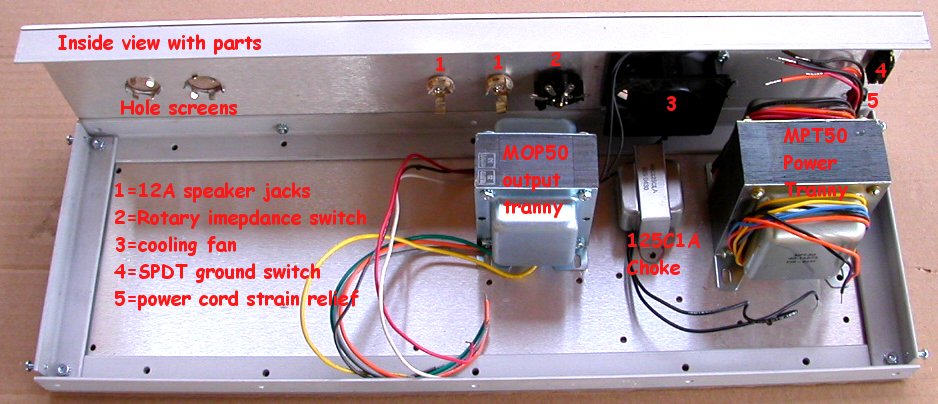 |
| Here you can see the inside view with parts installed. I already covered the small parts in
the picture above. Here I have some transformers mounted inside the chassis. The holes in the bottom chassis plate were all originally drilled for my Hoffman series transformers which are no longer available. I have used the MPT50, MOP50 and a 125C1A choke to illustrate where the transformers are mounted. I stock all three of these transformers. The 125C1A choke holes line up perfectly with the chassis holes, there is no need to drill holes for the choke. Both the MPT50 and MOP50 have two holes on one side that line up perfectly and two that don't. If you use these transformers, you just have to mark two holes for each tranny with a sharpie pen and then drill the holes. No big deal, this aircraft aluminum drills very clean and easy with a sharp bit. The main circuit board was mounted to the left of the trasformers. |
Enter My Tube Amp Parts Store Here
Mobile users Enter My Tube Amp Parts Store Here
The Tube amp Library of information
Click the link above for Tube amp info, Schematics, Board building information, Projects, Mods, Transformer diagrams, Photo's, Sound clips.
There are hundreds of pages of Tube amp information on my library page.
Please visit my Tube Amplifier Forum
Here's the place you can go to ask tube amplifier questions.
You will find a large community of friendly amp builders at the link above.
Check the huge library of Schematics here
Design your own custom Turret Board or Eyelet board
DIY Layout Creator file analyzer program
DIY Layout Creator file library
How to email me
|
MEMBER OF PROJECT HONEY POT Spam Harvester Protection Network provided by Unspam |