
| EL34's CNC Stuff |
| Back to main CNC page |
Making a Canon CD Tray type G |
| - |
| Click on the images to see a larger image |
 |
| This is what a real Canon type G CD tray looks like There are several tray types and you have to use the correct tray type for your particular Canon printer The CD trays sell for $20 to $40 on the web This device allows you to print images/labels on printable CD's and DVD's CD trays are included with Canon printers in all countries, except printers sold in the USA. Canon USA printers do not come with this tray and CD printing is disabled in Canon USA printers. But, the Canon USA printers have the ability to use CD trays, it's just not enabled in the printers It's easy to enable the CD printing feature in USA printers This web site below has links on how to enable the CD printing feature on your USA Canon printer You can buy new Canon CD trays on Ebay here. http://stores.ebay.com/Cd-Tray-Store_W0QQsspagenameZMEQ3aFQ3aSTQQtZkm |
| - |
| Click on the images to see a larger image |
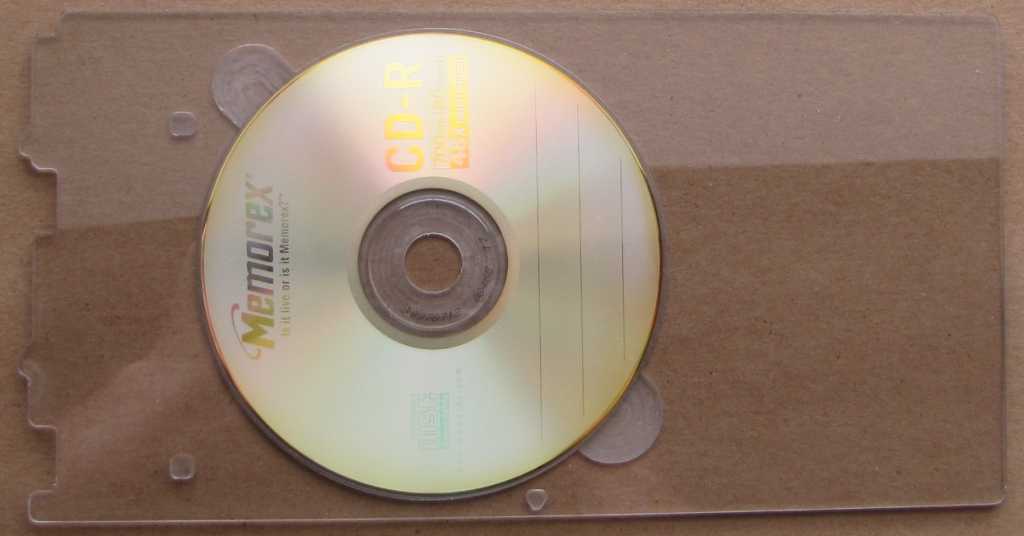 |
| So, I am looking at the tray picture and thinking I could CNC one I took the picture of the real tray and scaled it exactly right in my image software I knew that the tray was 131mm wide x 254mm long I did not know the exact thickness and so I took a guess. I added the CD tray image to my CAD software and traced out all the areas that needed cutting I used .090 thick Lexan I machined a pocket region so the CD can sit down inside the tray In other words, the top surface of the CD is even with the top surface of the tray. Later on I found out that the CD should be slightly above the surface of the tray. I machined a couple finger holes to be able to grab the CD It's hard to tell in the picture, but the center of the CD region is still there. Sort of like a record spindle There are also a couple small squares that are cut down into the face These areas have a shiny metal foil in them. The printer looks for these areas when it is getting ready to print the CD I am going to glue a couple small pieces of tin foil into the areas The small indent on the lower edge is an alignment mark You line this up with a mark on the printer to get it in the correct spot |
| - |
| Click on the images to see a larger image |
 |
| It's easier to see the recessed cuts in this image The strange lines are reflections from the blinds in back of the tray |
| - |
| Click on the images to see a larger image |
 |
| Here's the tray painted black After a few printing test I decided that the clear material was a problem The printer has a sensor that reads those two recessed shiny areas. The two depressions have some shiny bits in them so that they reflect the sensor beam back. This tells the printer that the proper tray has been inserted into the printer and it is lined up correctly for printing The printer will eject anything that is not sensed properly. The black color seemed to work better with way less ejections than the clear material I made a few other adjustments with my Dremel tool and a bench top sander. I ramped the front edge of the tray because it has to spread apart some rollers inside the printer. I had to help it along with a shove when it was not ramped. A note on the depth of the CD pocket area. I made mine so that a CD was flush with the top surface of the tray. It seems now that having the CD stick up above the top surface works better. The rollers in the printer seem to grab onto the CD surface better when it is higher than the tray surface. The under surface of the tray cannot be slick The bottom rollers in the printer needs to grab onto the tray and move it back and forth. The Lexan by itself was pretty slippery I painted the tray with some Barbeque grille paint cause that's what I had on hand It stuck to the sanded Lexan real nice and gave it more grip, with less slip. |
| - |
Enter My Tube Amp Parts Store Here
Mobile users Enter My Tube Amp Parts Store Here
The Tube amp Library of information
Click the link above for Tube amp info, Schematics, Board building information, Projects, Mods, Transformer diagrams, Photo's, Sound clips.
There are hundreds of pages of Tube amp information on my library page.
Please visit my Tube Amplifier Forum
Here's the place you can go to ask tube amplifier questions.
You will find a large community of friendly amp builders at the link above.
Check the huge library of Schematics here
Design your own custom Turret Board or Eyelet board
DIY Layout Creator file analyzer program
DIY Layout Creator file library
How to email me
|
MEMBER OF PROJECT HONEY POT Spam Harvester Protection Network provided by Unspam |