
EL34's CNC Stuff - Red Oak CNC table |
|
| Back to main CNC page | |
| - | |
| Click on the images to see a larger image | |
 |
 |
|
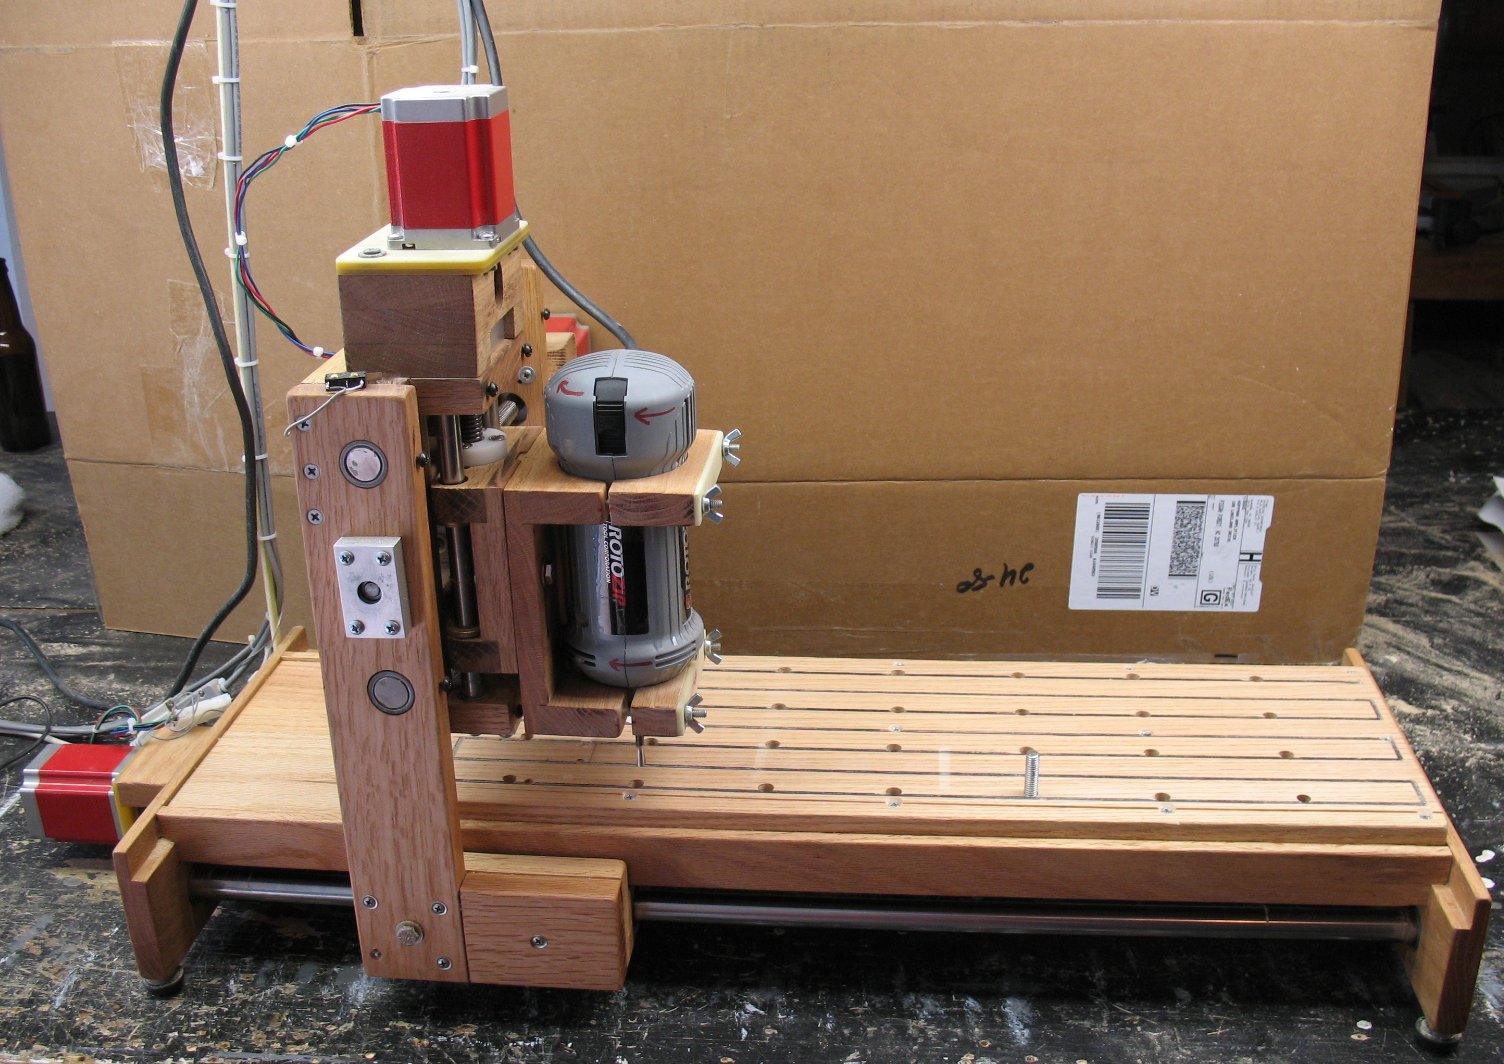
Assembled table Most parts were assembled on a leveling table using two part epoxy. Screws tend to pull parts out of alignment and so I epoxied things while they were being held true in a jig. I then added some screws here and there after the epoxy had hardened overnight. The Y axis uprights were trued to the Z axis using a dial indicator. I am about .5mm out from one end of the table to the far end, not bad for wood. After I add the grooved oak clamp down top, the table surface height will come up another .75 inches. After the machine is able to run under computer power, I can level the top surface using router bits. |
|
| - | |
| Click on the images to see a larger image | |
 |
 |
| - | X Axis limit switches |
|
I actually chucked up a few router bits and tested the table on some wood pieces by pulling the slides around manually. It's quite smooth feeling and the Rotozip tool seemed to have a bunch of power. |
|
| - | |
| Click on the images to see a larger image | |
 |
 |
|
Here's the finished router. I cut several oak pieces to test it out and it works great so far. I need to change the top bolt down surface to a slotted type. It's a pain to thread studs down into the pre drilled holes, but it's working fine for now. |
|
| - | |
Enter My Tube Amp Parts Store Here
Mobile users Enter My Tube Amp Parts Store Here
The Tube amp Library of information
Click the link above for Tube amp info, Schematics, Board building information, Projects, Mods, Transformer diagrams, Photo's, Sound clips.
There are hundreds of pages of Tube amp information on my library page.
Please visit my Tube Amplifier Forum
Here's the place you can go to ask tube amplifier questions.
You will find a large community of friendly amp builders at the link above.
Check the huge library of Schematics here
Design your own custom Turret Board or Eyelet board
DIY Layout Creator file analyzer program
DIY Layout Creator file library
How to email me
|
MEMBER OF PROJECT HONEY POT Spam Harvester Protection Network provided by Unspam |