|
|
|
|
|
|
|
|
|||
|
|
 Cave
CaveHome |
 Cave
CaveEquipment |
Cave Printing TutorialStep 4: Page SetupAfter you have established your image's printable size, and performed any cropping you would like to perform, you are now ready for Page Setup. This section tends to give people a lot of headaches, but it is one of the most important steps in Inkjet Printing. If you haven't already done so, look at the glosary entry for Margins, and then also if you haven't already done so, cut your paper to your desired size. Go up to the menu bar and choose "File--->Page Setup..." You should now see a screen similar to this one: 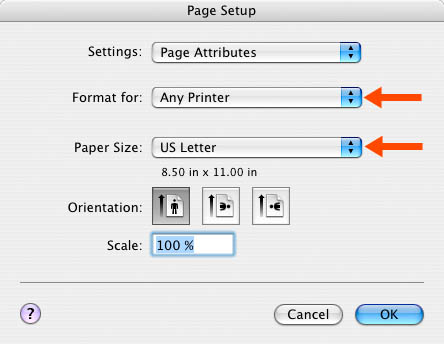
Click the menu next to "Format for" and choose the printer you will be printing with. Unless you are printing with a roll of paper in the printer, you will most likely want the printer with "Sheet" in the name, or if there isn't one that says "Sheet," choose whatever printer there is that does not say "Roll." After choosing your printer type, you now need to set up your "Paper Size." Click on that menu and either choose a pre-defined paper size from the list (such as "8x10" or "Super B3," or if you are using a custom paper size, go down to the bottom and choose "Manage Custom Sizes..." You will see a window like this: 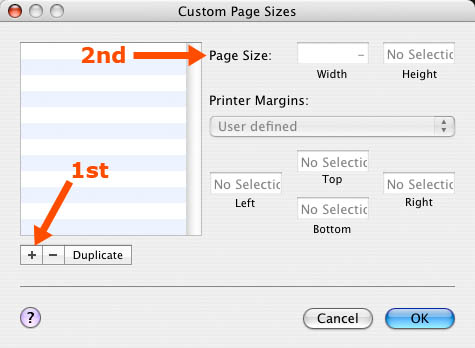
As indicated by the red arrows above, you should first create a new paper size by clicking the plus sign near the lower left of the window. The new paper size appears on the left as "Untitled." Double-click where it says "Untitled" and type a new name for your paper size. Use a descriptive name that tells you, and others, some useful info about that paper size, like "17w x 22h" for 17 inches wide by 22 inches high. Next, enter the correct width and height values for your paper size. Remember, the width is the direction "across," or also the direction the print head travels. The length is usually the larger value; the paper travels through the printer along it's length. After entering width and height, click the menu under "Printer Margins" and select the printer type you are using. Unless you are printing with a roll of paper loaded in the printer, you will almost always want to choose the "Sheet" printer, or the printer without "Roll" in the name. This image gives you an example of how things should be looking by now: 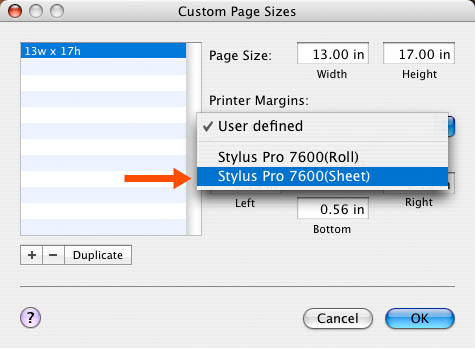
Notice that, after you choose your printer, the Left, Right, Top, and Bottom margins have been filled in with the printer's minimum margin settings. These default settings are usually completely adequate for most print jobs. Click "OK" and you will be taken back to the "Page Setup" window. Your Printer type should still be selected under the "Format for" menu, but you will now need to select your custom paper size in the "Paper Size" menu. Also, if you need help selecting the correct "Orientation," see the glossary. When you are done, you will have a window that looks similar to this: 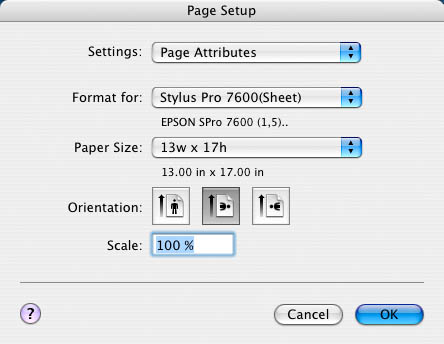
Click "OK" and you're done with Page Setup! |
|
|||||
|
|
 Managing
Color |
 Tips &
Tutorials |
|||||||
|
|
 FAQ
FAQ |
 Cave
CaveRules |
|||||||
|
|
 Glossary
 |
 Send
SendMessage |
|||||||
|
|
 Art
ArtHome |
 UCSC
UCSCHome |
|||||||
|
|
|||||||||

