
Behringer FCB1010 ModsBack to the main Sound page |
| - |
| Click on the images below for a larger image. |
|
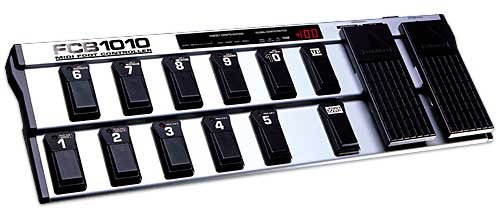
| Behringer FCB 1010 midi foot controller |
| The Behringer FCB 1010 midi foot controller is a pretty handy device for controlling midi devices. The stock unit has 10 pedals for switching midi presets. It has two pedals that let you move up or down through different midi banks. That lets you select up to 128 midi presets. It also has two expression pedals that can be used as a Wah Wah or to change any parameter like delay times, etc. It has a digital display along the top edge that shows the current preset number and other info. Note that I have installed the UNO chip mod in my FCB1010 and that changes things around just a bit. I use my FCB1010 to control Guitar Rig. On my FCB 1010, the bottom 1-5 pedals change presets and the top row pedals 6-10 act as stomp box pedals. With the UNO stomp box chip installed, I can turn on and off effects inside of a preset. Example: A Guitar Rig preset has a Wah Wah pedal, and I can turn that on or off or I can turn on and off a delay, reverb Octaver, etc. The expression pedals can turn knobs and change parameters on a effect. If I turn on a Wah Wah, I have the right side expression pedal that then controls the Wah Wah effect. the Wah Wah slider in my Guitar Rig preset moved when I wiggle the expression pedal |
| - |
| Click on the images below for a larger image. |
|
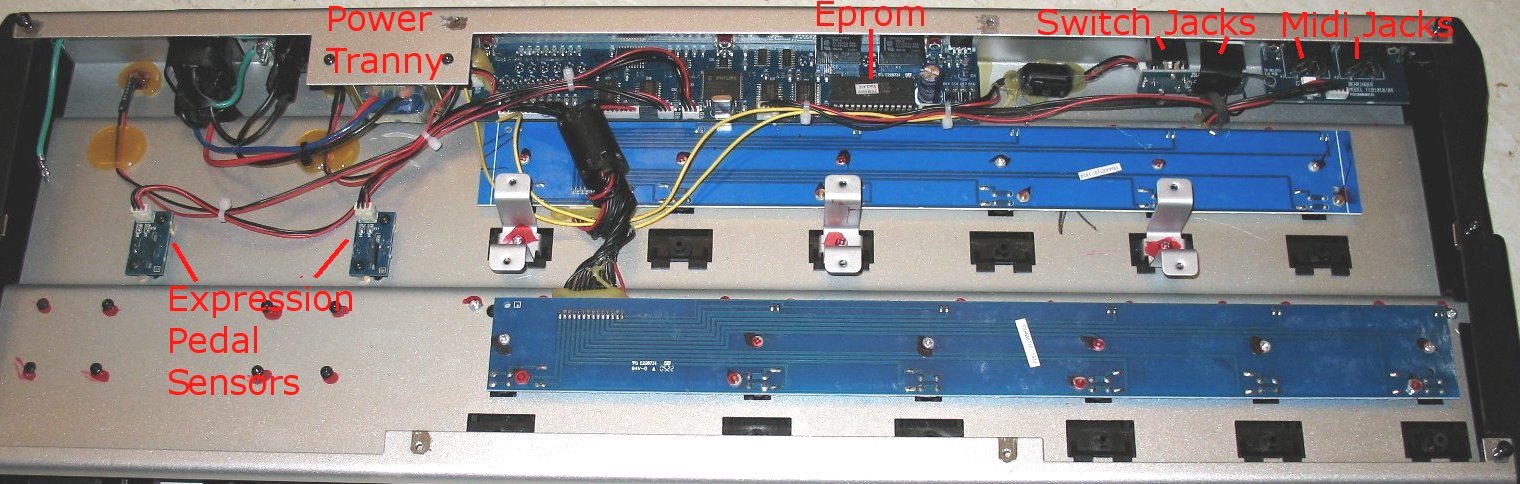
| Here's the inside of the FCB1010 Behringer melts hot glue all over the part that they do not want to move. I removed much of the hot glue so that I could take some decent pictures and be able to remove the parts. |
| - |
| Click on the images for a larger image. |
|
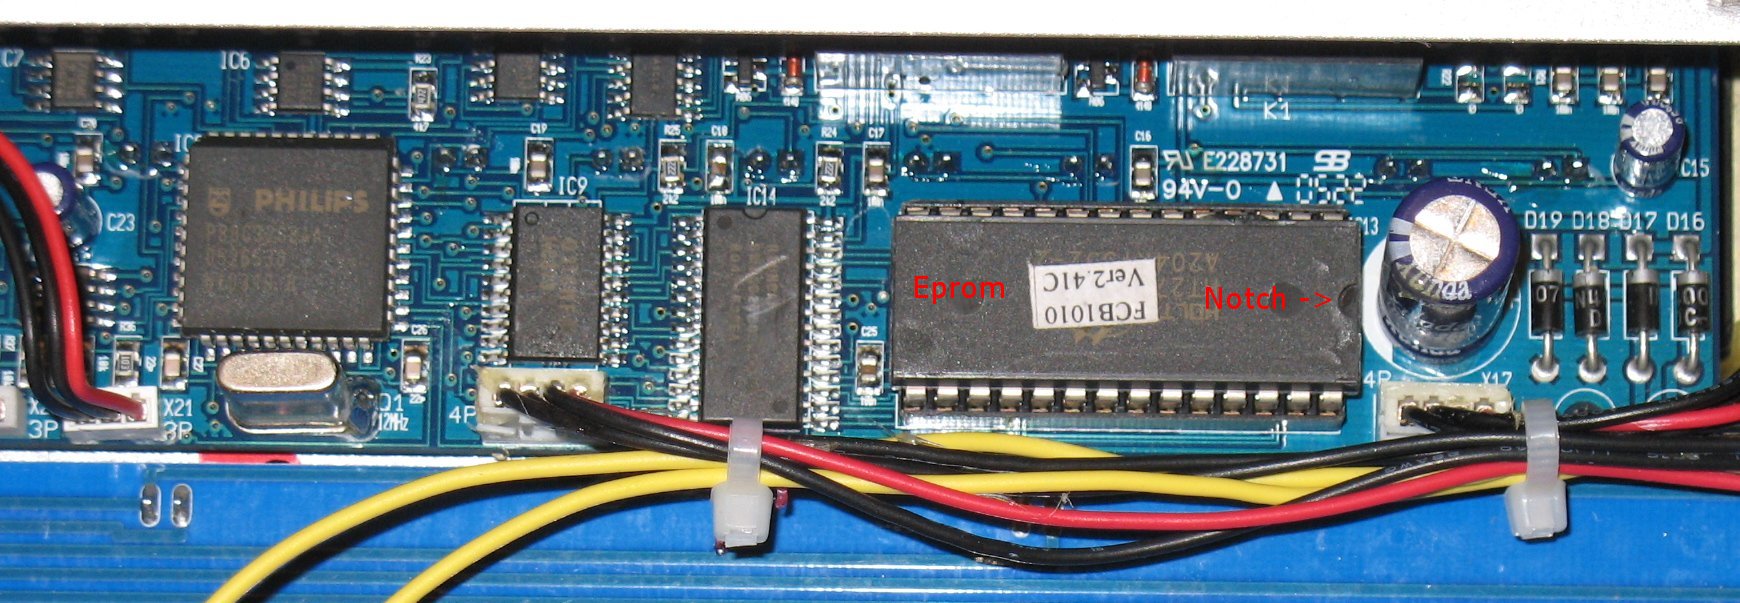
| A closer shot of the PROM |
| - |
| Click on the images for a larger image. |

|
| Super close up of the PROM. Note the notch direction. I removed all the hot glue that was blobbed onto the PROM. Update: I have since removed the stock PROM in this picture and upgraded to the UNO PROM. |
| - |
| Click on the images for a larger image. |
|
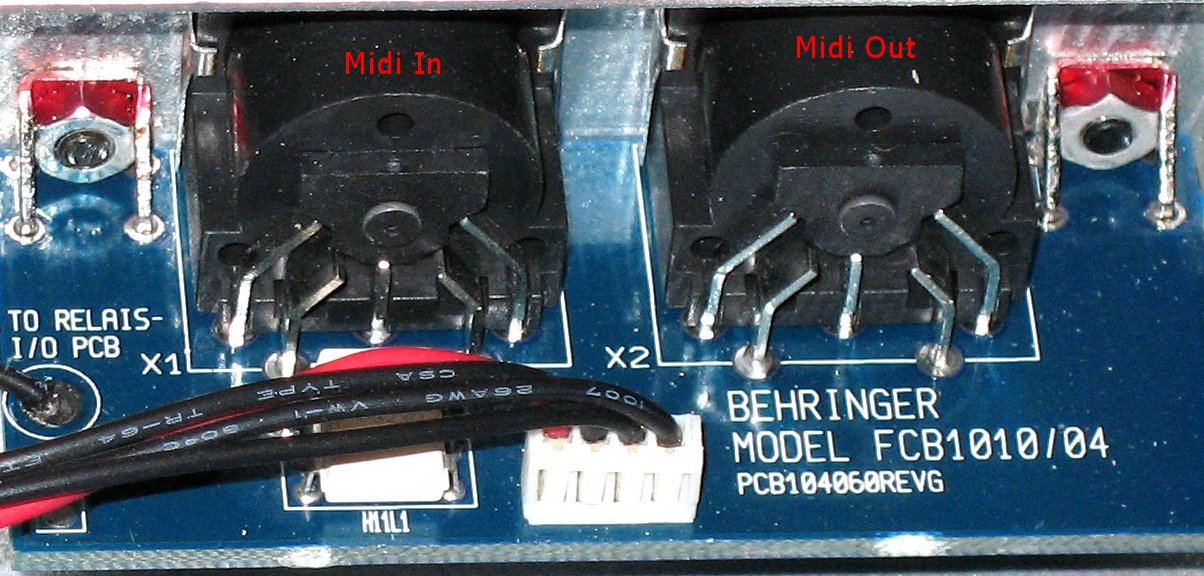
| Midi In and Midi Out jacks |
| - |
| Click on the images for a larger image. |
|
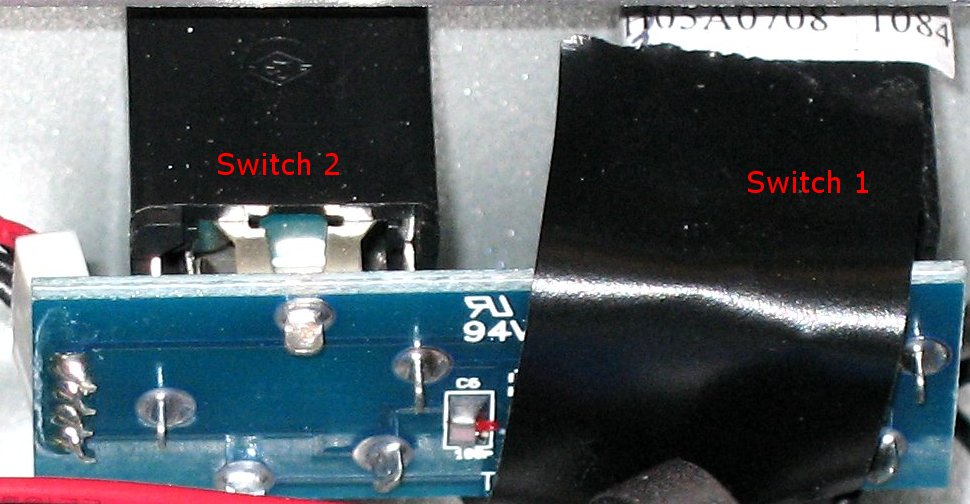
| Switch 1 and Switch 2 jacks |
| - |
| Click on the images for a larger image. |
|
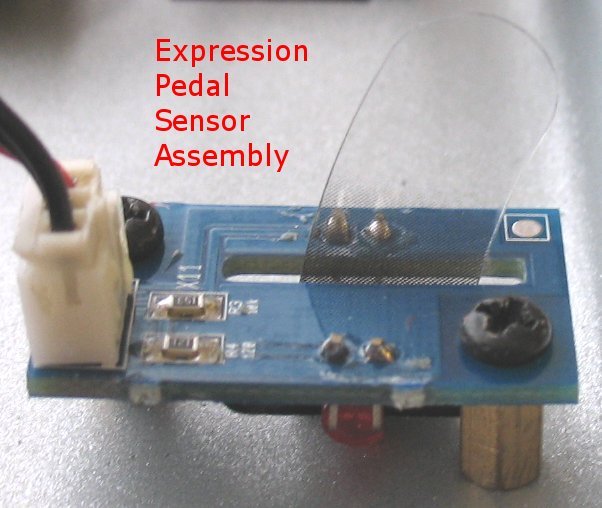
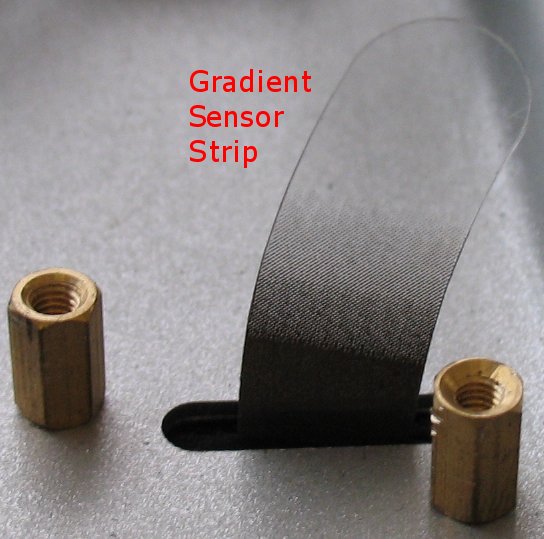
| The expression pedals do not operate with a variable resistor/Pot, like a standard Wah pedal does. Each Expression pedal has a Sensor strip that is dark at one end and gradually gets clear at the other end. A LED and a Infrared Sensor assembly is used to sense infrared light waves that pass through the Gradient sensor strip. The LED light waves are blocked at the dark end and not blocked at the clear end. Then there is every combination in-between dark and light on the strip as you move the expression pedal through it's full range of motion. |
| - |
| Click on the images for a larger image. |
|
| Close up of the Gradient sensor strip |
| - |
|
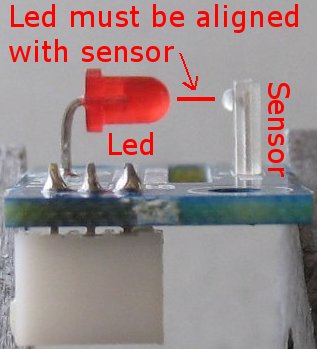
| Here you can see how the LED and sensor are aligned so that the LED points directly at the sensor. I have heard of people having problems with the expression pedals not being able to get their full range, which is Midi 0 to 127. If you are having range problems, check to make sure the LED and sensor are in perfect alignment. You can gently bend each part to get them to align perfectly. Make sure the Gradient sensor strip is not rubbing on any part of the circuit board. You can adjust the board position with the two mounting screws so that the Gradient sensor strip travels right down the middle of the opening on the circuit board. |
| - |
Enter My Tube Amp Parts Store Here
Mobile users Enter My Tube Amp Parts Store Here
The Tube amp Library of information
Click the link above for Tube amp info, Schematics, Board building information, Projects, Mods, Transformer diagrams, Photo's, Sound clips.
There are hundreds of pages of Tube amp information on my library page.
Please visit my Tube Amplifier Forum
Here's the place you can go to ask tube amplifier questions.
You will find a large community of friendly amp builders at the link above.
Check the huge library of Schematics here
Design your own custom Turret Board or Eyelet board
DIY Layout Creator file analyzer program
DIY Layout Creator file library
How to email me
|
MEMBER OF PROJECT HONEY POT Spam Harvester Protection Network provided by Unspam |